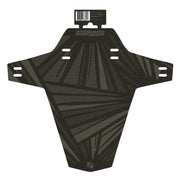


Rayday Frame Keeper (BLEM)
One-Year Warranty
Free U.S. Shipping w/ orders over $50.
During the production process, mistakes happen. From scratches to cut quality that doesn't quite meet our standards, we like to keep our imperfect products out of the landfills. Please note that each piece of these kits has been deemed useable, but may require a little TLC with an X-ACTO or a pair of scissors to achieve the best results.
Our industry-leading frame protection is easy to install and provides durable protection against scratches, chips, shuttle rub, and whatever else is thrown it's way.
Our universal kit is designed to fit all bikes and sizes and comes with 6 easy-to trim pieces for toptube, downtube, chainstays, and seatstays. Designed to fit XL frames, each piece can be trimmed down to desired length and width.
If you are a visual learner, checkout this lovely installation video
1. Clean your bike thoroughly and wipe frame with isopropyl alcohol. Wash your hands to ensure you don’t leave any dirty fingerprints under the glue. If it’s below 50 degrees Fahrenheit, roll your bike indoors for the following steps.
2. Grab a pair of scissors or an exacto knife. All pieces are designed for larger frames and will likely need to be trimmed before mounting. Before removing the backing, line each piece up to your frame and mark any pieces that need to be shortened or thinned. Trim from the bottom and make sure to round any hard edges (this will help it from pulling up over time).
3. Remove backing and center the guard where you want it. Make sure to do any repositioning before applying pressure. Once you’re happy with the position, lightly tack the center of the guard from top to bottom. Apply pressure from center to sides, pushing out any air/bubbles with your thumbs. We don’t recommend wet application with our material.
Pro Tips:
• Lightly blasting each piece with a hairdryer or heat gun before applying pressure warms the adhesive and makes for an easier application.
• If you have issues wrapping guard around curves, add additional relief cuts where needed.
• To avoid leaving finger prints on transparent Frame Keepers, wet your finger tips if you need to reposition the guard.
• Use a vinyl squeegee tool to help eliminate bubbles during the application process.
• Get clever with your scrap pieces! Throw them on the seat tube, top of the downtube, or wherever you may experience cable rub.
Removal:
ALWAYS use heat when removing Frame Keeper to ensure clean removal. We also recommend using heat when repositioning the Frame Keeper during application.
Quality Materials
- High tack, flexible and easy-to-install material that conforms to the curves and contours of the frame while providing ample protection. At 10 mil thick it's the goldilocks thickness between durabilitly and conformability.
- High resolution graphics digitally printed with industry-leading equipment and topped with ultra-thick UV and scratch resistant laminate.


